SwiftUI Apps
Overview
Getting started for apps that are built with SwiftUI. If you're not building a SwiftUI app, and instead are using UIKit, you should look at the UIKit article instead.
Integration
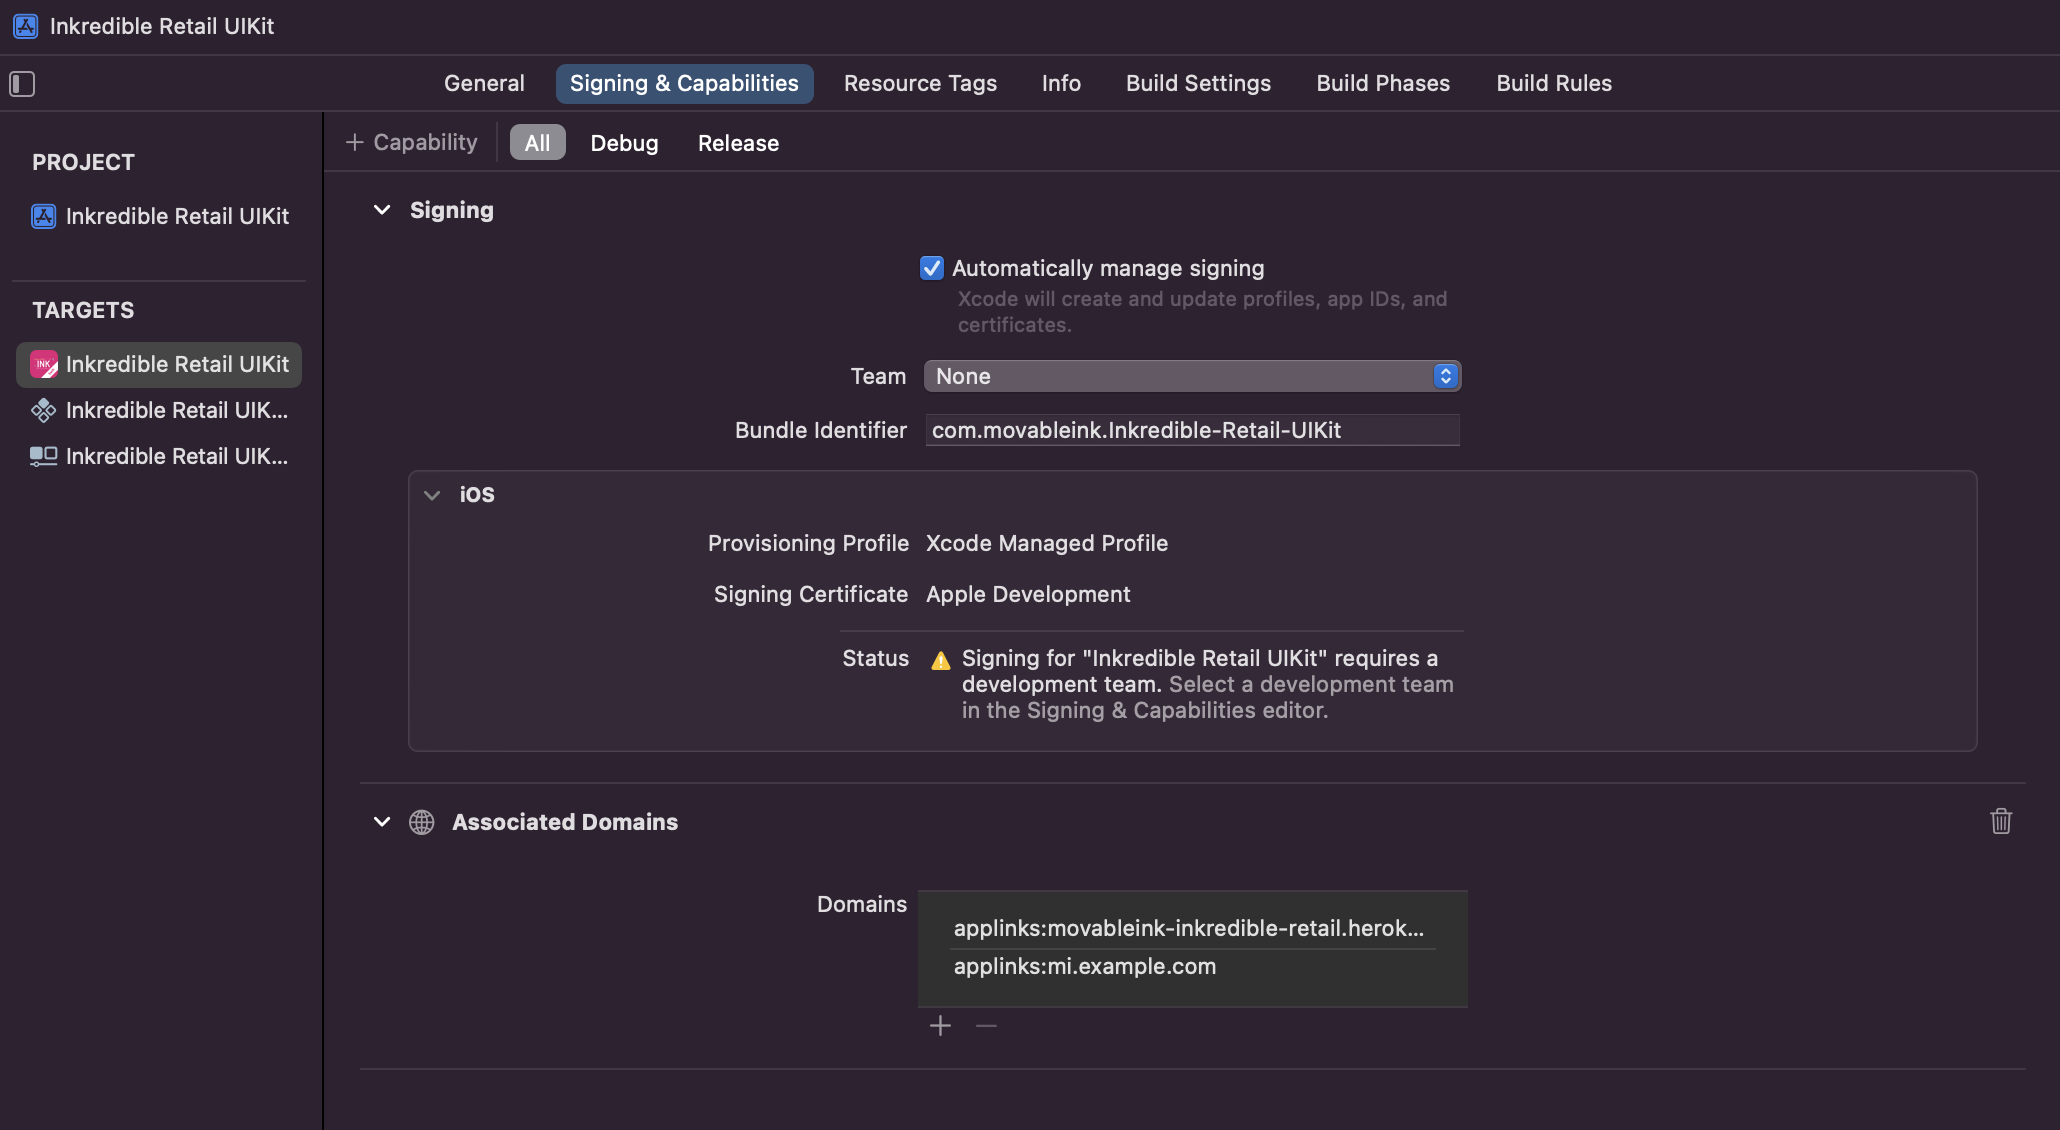
Under the Signing & Capabilities tab, add the Associated Domains Capability, then add the applinks that you can support.
One of these should be your MovableInk domain, such as mi.example.com. If you're unaware of what your MovableInk domain is, you can check with your Movable Ink client experience team. If you're also using DaVinci, you can add that domain here as well; usually click.example.com or dv.example.com

In your App, import MovableInk, call the start method in the constructor, add the onOpenURL modifier, and the onReceive modifier.
You can supply an API Key for Behavior Events; learn more here, and a list of domains you'd like the SDK to handle. These domains should be the same ones that you added above when setting up Universal Links. You can also supply the list of domains via the plist if you wish; learn more in the Setup Domains via Plist section below.
Note: do not use schemes, such as https:// when providing the domains
import SwiftUI
import MovableInk

@main
struct InkredibleRetailApp: App {
  init() {
    MIClient.start(deeplinkDomains: ["mi.example.com"])
  }

  var body: some Scene {
    WindowGroup {
      ContentView()
      .onOpenURL { url in
        MIClient.handleUniversalLink(url: url)
      }
      .onReceive(MIClient.storedDeeplinkSubject.receive(on: DispatchQueue.main)) { value in
        guard let value = value, let url = URL(string: value) else { return }

        // This closure will be called with the resolved deeplink
      }
    }
  }
}
Setup Domains via Plist
If you wish to load in your domains via the plist, the SDK can support that too.
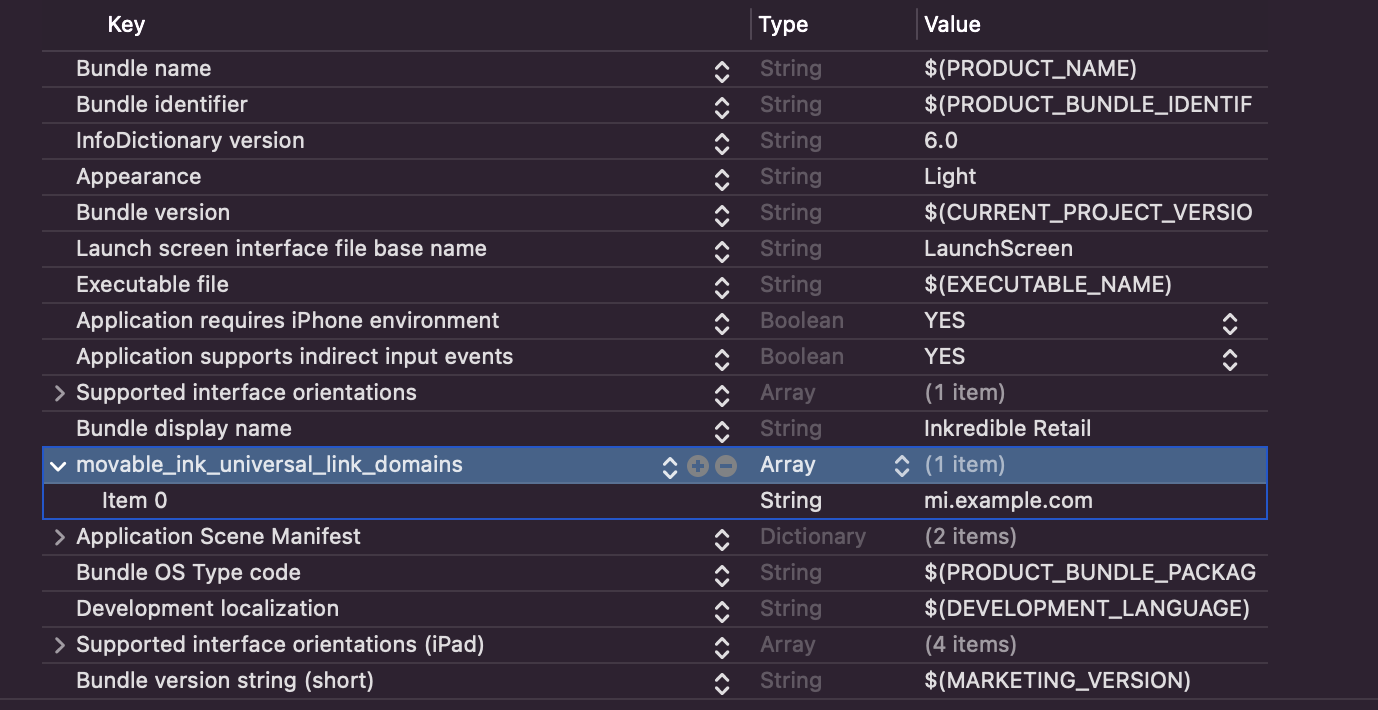
In your Info.plist, add the movable_ink_universal_link_domains key as an array containing all the domains that you'd like the MovableInk SDK to handle. These domains should be the same ones that you added above when setting up Universal Links.

If you already set your domains in code, you don't need to do this.
Deeplinking
That's it! Now you can update your code to capture clickthrough urls and deeplink into your content.
If you don't already have a working implementation of deeplinking into your content, you can view the sample apps as an example.
You can go to the SwiftUI Deeplinking Solutions article to learn more as well.